Menu
Log in

maa blog


  • 03/26/2019 12:27 PM | Anonymous member (Administrator)

    Happy news friends, ice climbing is never over! How? Because "ice climbing" includes not just climbing water ice, but also the spring "alpine ice" season, summer glacial ice climbing, and even fall couloir climbing. Yesssss! Amazing and true. :)

    Let's start when it's too cold to rock climb anymore -- with freezing late fall and winter temperatures. As the creeks and cascades harden, water ice climbing season begins, with the pillars, faces and gullies gleaming with hard ice. Lee Vining, June Lake, Ouray, Bozeman, Cody, Canada...we love it. We'll continue kickin' and pickin' steep and vertical ice through the winter using short-shafted "ice tools" with a reverse curve pick and sharp vertically oriented ice climbing crampons, from November to March. This continues while winter snow is falling readying for the "next season" of ice climbing, which is just around the corner.

    [MAA team climbing over the bergschrund on an ascent of the famous U-Notch route on North Palisade]

    Sometime around April in the Sierra, as the water ice melts away, all that winter snow continues to condense and harden. About the time we no longer need those double boots, steep couloirs in the mountains are hard enough to climb. This is the "alpine ice" season a.k.a. as the time to climb Round Top, Tallac, Baldy, Red Slate, Mendel and the like. Specifically, this is "névé climbing", which is old snow that hasn't yet been around a year. Névé has gone through enough freeze / thaw cycles that it can be climbed with two tools -- either a mountain axe and a ice tool, or two hybrid tools -- and rock pro and snow pro can be used as you simul-climb with your team for thousands of feet. 

    [Climbing a north facing couloir using two tools and both ice screws and rock pro, this type of ascent allows a climber to use all their training]

    These couloirs and faces provide direct access to the glorious mountain summits. Days are longer and the high peaks are warmer - make sure you get an early start and are back to camp for a late lunch before the rocks and ice start coming down!

    Once the névé is hard enough to take an ice screw or very resistant to shoveling, it is classified as "firn" and is a dream to climb, because it takes picks with less effort than water ice and yet is very secure. To climb alpine ice, the technique is a little different that water ice climbing. Typically a climber will keep their tools lower, climbing with them in low dagger, or mid-dagger position. This allows a climber to quickly and confidently crawl up steep snow slopes without having to use an overhead swing.

    In addition to learning this, MAA provides comprehensive training how to use ropes, team self arrest, place protection and be a member of a team for this type of "ice climbing" in our Snow 3 and Snow 4 classes. 

    Which ice axe to choose? How do you know which is the best one for your chosen application? Outdoor Gear Lab is a trusted source on all kinds of gear; here is an excellent review of all piolets classified as "ice axes" - which is all straight shaft or slightly bent shafts models, which are good for everything from mountaineering to steep hard snow and even low grade water ice. 

    [MAA expedition team on the Tres Montes route in the Mont Blanc Massif]

    While alpine ice season is underway, the biggest mountains in North America are coming into shape. Sometime around May, and continuing into the fall, ice climbing now expands to include the glaciers and high mountains, full of glacial ice, tumbling seracs, and snow and ice in all it's wonderful forms. The technique we practiced in the winter and spring can be applied to the steep, hard slopes of many glaciated mountain faces and aretes. Think Mt. Rainier, Mt. Shasta, Mt. Baker, and Alaska.

    And it's not over yet...right about the time the crevasses are too numerous to negotiate, usually around September, we can return to the high peaks for a few last ice climbs until November. Nothing like a Halloween climb up the North Couloir of North Peak. The firn that has been hardening for many months is now dense, dirty, rock-hard snow. It will take ice screws and climbs almost like water ice, with much less shattering. We can touch the summits once more before winter closes in and the cycle begins all over again. 

    [MAA members approach North Peak, North Couloir route on an early fall morning]

    And if this wasn't great enough, if you can travel north (or south) far enough, or high enough, in any season, you can always find "ice climbing". All types. Guaranteed. You just need to know where to go.

    So you see, ice climbing season is never truly over. Keep your tools sharp!   

  • 03/12/2019 7:56 AM | Anonymous member (Administrator)

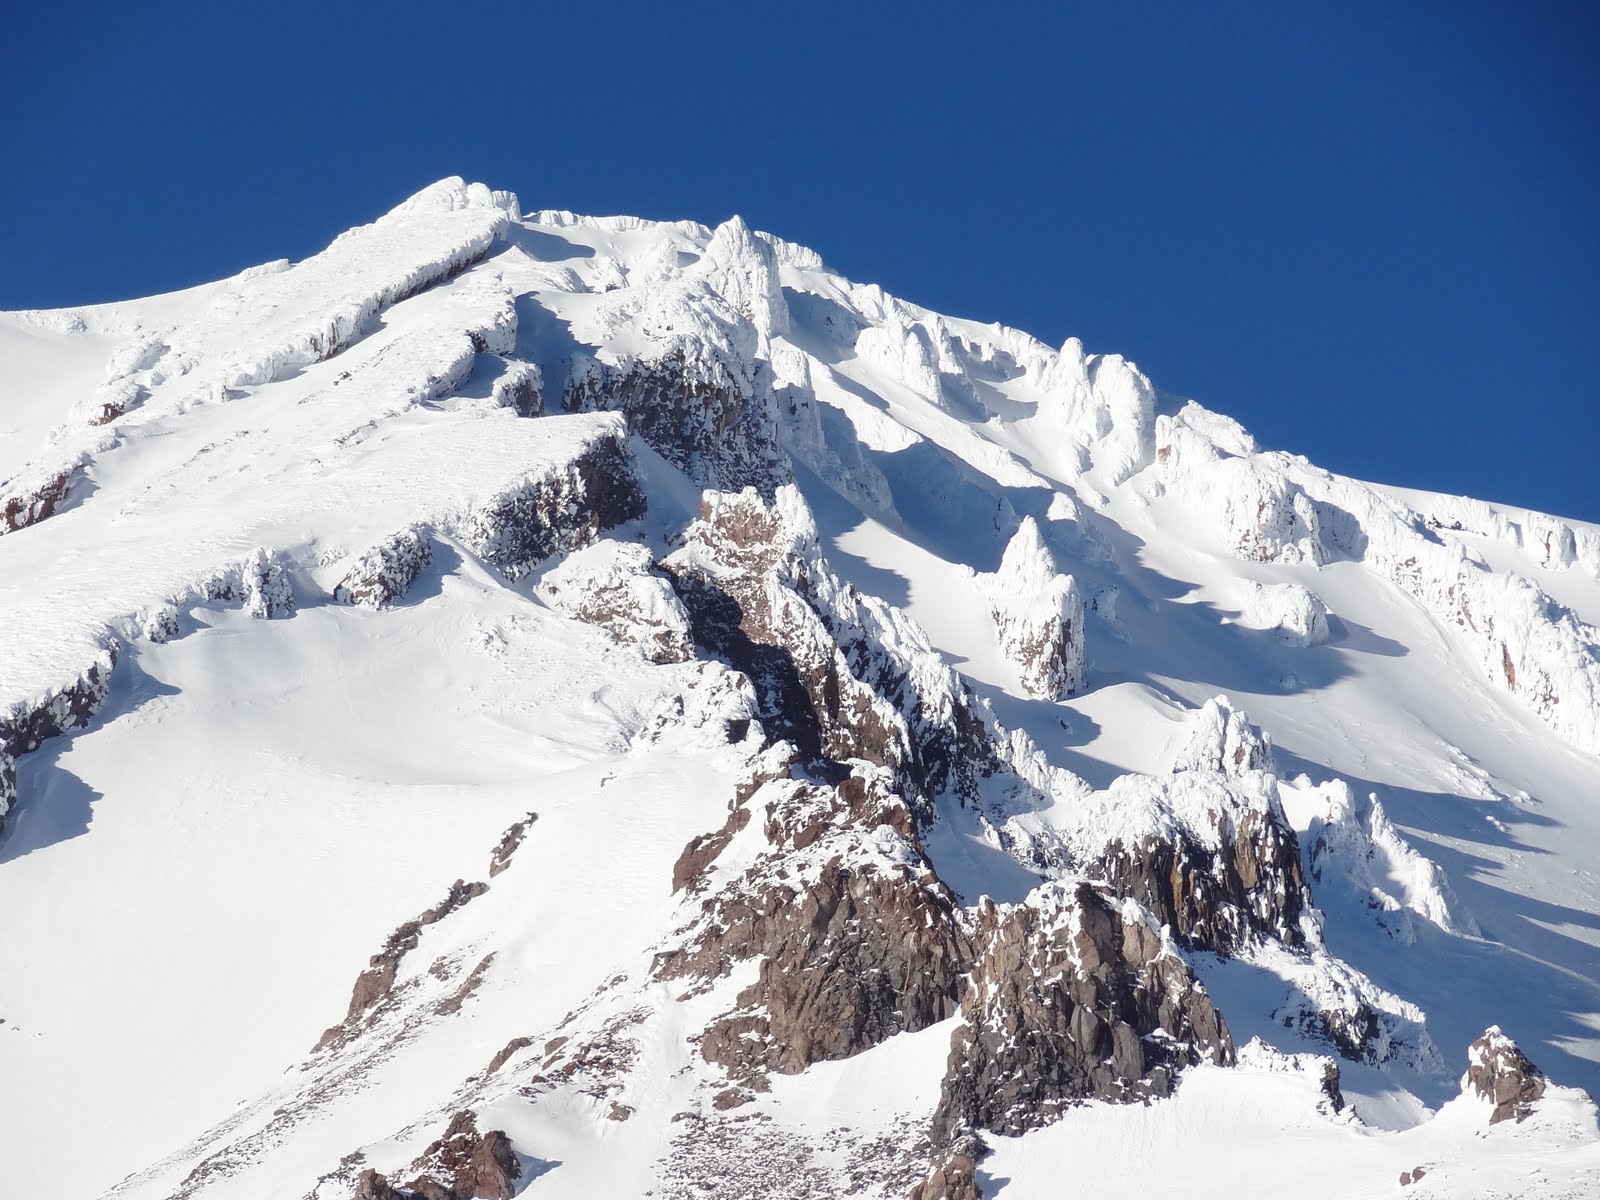
    [Mt. Shasta's beautiful and elusive north side, showcasing the Hotlum-Bolam Ridge route, with the Hotlum Glacier on the left and the Bolam Glacier on the right, with the Whitney Glacier far right.]

    It's an icon of northern California and one of the most sought after summits along the west coast, 14,180' Mt. Shasta. This prominent volcano offers excellent opportunities for climbing, skiing, and hiking on it's glacier clad slopes and one of the best summits anywhere - a small castle of rock with a sheer drop on all sides. 

    [MAA summiteer elated with the 100 mile view in every direction.]

    Mountain Ascent Association has been climbing Shasta since the very beginning in 2009, and to date we have logged close to 40 trips there, climbing all the major routes. 

    I'm often asked about Mt. Shasta, when to climb it, where the best routes are and how to prepare for success. These are topics we discuss in our Mt. Shasta Seminar which you can view on our YouTube Channel here

    However, some highlights would be appropriate, let's do them in a FAQ format.

    Q: Should I climb Avalanche Gulch?

    If you've never been to Shasta before Avalanche Gulch is a good route to ascend because it's one of the easiest routes. However, it is crowded and prone to ice and rock fall, plus the perils of the mistakes of ill-experienced climbers. For those reasons I recommend the West Face or Hotlum Bolam Ridge routes instead. They require a bit more travel and have more routefinding components, but are far less crowded, more scenic, and ultimately more safe. 

    [Typical weekend scene at basecamp for Avalanche Gulch]

    Q: What training should I get in order to climb Shasta?

    You absolutely need to know how to climb steep snow and perform an effective self arrest. In MAA, these skills are addressed in SNOW 1 and SNOW 2. You also need to know how to travel, camp and navigate in snow. These skills are addressed in MTN 2 training course. You do not need to have this training from MAA, you just need to be have the skills to climb the steep and slippery snow slopes confidently and safely.

    Most importantly, you need to be fit enough to climb a minimum of 4,000' per day with a pack at altitude. You should not expect to succeed by just jumping off the couch and heading up there. Put in at least two months of cardio training prior and you'll be much happier and successful on your ascent. 


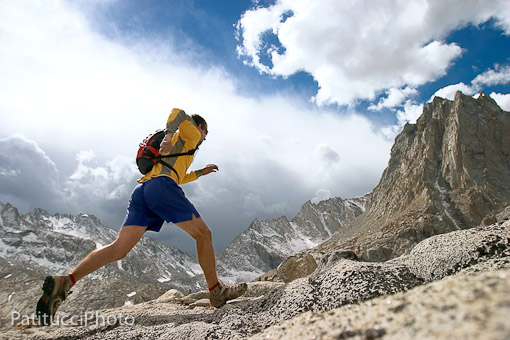
    [Credits: Patituci Photo]

    Q: I want to climb Casaval Ridge. What's the best way to prepare for it?

    Casaval Ridge is a scenic route and is best done in the spring - April is usually the best month. However, since it is climbed on the coattails of winter, and because it is a prominent southern facing ridge, you should expect and be prepared for monster winds. They've been known to blow camps right off the ridge. Over the last 7 years about half of our teams have been unable to summit due to high winds and low visibility, so take a healthy dose of patience and caution. If you are really committed to summiting via Casaval it's best to plan at least 4 days. Study the route carefully ahead of time, get a very early start - like 2 am - and climb fast. Most parties do not rope up for the Catwalk. 

      [The majority of the Casaval Ridge route. The Catwalk is the last right trending rock band before gaining the ridgeline of Misery Hill]

    Q: How often does MAA climb Shasta?

    Mountain Ascent Association climbs Shasta every year, between 4 and 8 times, during the months from April - July. This year we have 6 events so far and a few more in the planning stages. We also conduct glacier climbing and crevasse rescue courses there for Apex members.

    Our favorite routes are any Hotlum route (HB ridge, HB glacier, and left and right ice gullies) and the ridge routes (Casaval, Sargents, and Green Butte), with West Face as a great alternative to Avalanche Gulch. We'll also be on the Wintun glacier this year. The Whitney Glacier is another route we've climbed in the past that is an adventurous and worthwhile route.

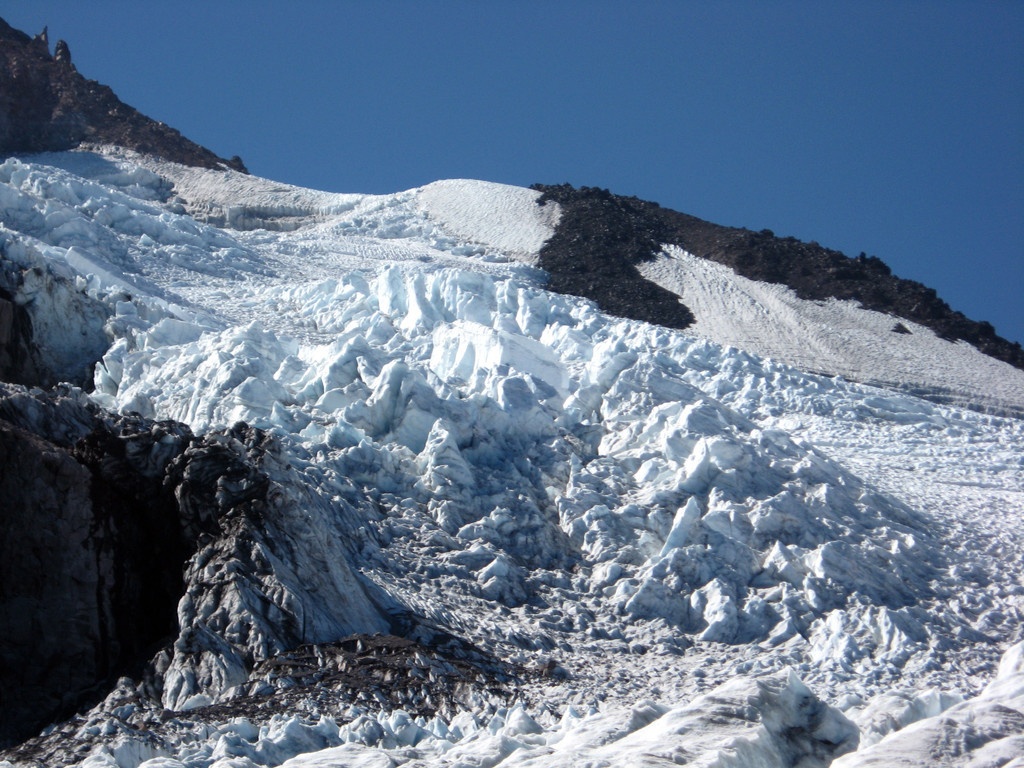
    [The upper icefall zone on the Hotlum Glacier in late season]

    Q: What are the main hazards of climbing Shasta?

    Unquestionably the biggest hazard is wind. It can be unpredictable and not on the forecast. It also varies in intensity depending upon which side of the mountain you are climbing. The worst culprits seems to be the windward southwest side and the colder, glaciated northwestern side. 50+ mph winds have often been present on the Hotlum Glacier and Casaval Ridge and on the summit 100 mph winds happen often, especially in the winter and spring.

    Winds will not only make the climb colder and miserable, they may create a whiteout where navigation is difficult or impossible. Be prepared to descend and know your descent route well, even to the point of having a compass bearing handy. The other hazards of the mountain are other climbers, falling in or glissading into a crevasse, glissading with crampons on (never do this) and falling ice and rock.

    [MAA climber dealing with high winds on a typical winter climb on Round Top]

    Q: What are the best things I should expect from my climb?

    There's a lot to expect! Mt. Shasta is a beautiful, accessible, high mountain with a variety of routes and a lot of room for everyone. The weather is usually great and the views are stunning. It's easy to get there on the interstate, and usually can be climbed in a weekend.

    Shasta is a great mountain climb in its own right, but it also offers the perfect training ground for higher and more difficult objectives. It's the perfect "mountain gym". Shasta is just as accessible as Mt. Hood or Mt. Baker, but it is hundreds of feet higher at 14,180. Rainier is the only Cascades volcano that's higher, at 14,410'. However, unlike Rainier, Mt. Shasta is less serious and less massive, with only a few glaciers that are big enough to practice with, but not so big they are a major hazard. So it's high enough to be useful for a "high altitude" experience but small enough that is doesn't require a major expedition effort to climb. 


    [MAA climber Dustin in the icefall on Mt. Stuart]

    Q: Can I climb Shasta on my own?

    Yes...if you have the skills, fitness, and a partner. Don't head up there without all of those. Study the route ahead of time, monitor the weather, don't skimp on clothing and equipment, and be ready to turn back if things aren't right. But do go for it - you will be rewarded. Climbing Mt. Shasta is a stellar experience.

    [One of our teams happy on the summit after climbing the HB ridge]

  • 03/06/2019 7:00 PM | Anonymous member (Administrator)

    This past weekend we had planned to do a winter ascent of Mt. San Gorgonio here in SoCal, but due to bad weather opted for a day climb of Mt. Baldy via the longest chute in the bowl - Schitzo Alley. Kevin, James, and I (toad) met at Manker Flats around 7am and on Sunday, March 3rd. All of SoCal was socked in with clouds except the mountains. Gorgeous day up high! We were stoked to be there! After a quick ascent to the ski hut where we geared up, we got to climbing an avalanche scar (avy from previous weekend) on our way up the bowl. A ton of ice-gravel coming down the bowl, ice pin-wheels, and some decent sized rocks. Was a very headzup climb. Once at the base of the rocks we traversed east and into the Schitzo Alley chute. Lots coming down the chute including some soft snow, so we hugged the sides for safety. Near the top of the chute we found the source of constantly-raining-ice. The storm that came through the previous day had a very high freezing level (around 9300') so all the rocks and trees were fully coated in ice that was now peeling off in response to sunny-day rising temps. Made for some great pictures though. We topped out around 11am, tagged the summit, and skeedaddled to escape the high winds (blowing 35+mph). After stopping for grins at a great viewpoint on the ridge, we continued down into the now rising cloud layer and back to the TH by 2pm. Was a shweeeet day!!


    Our route up Baldy Bowl. Fun line!


    Getting started up the bowl.


    Kevin making fresh tracks.


    Nearing the top of the chute. Ice coating everything up here. 


    Topping out. Now just 1/4 stroll to the summit.


    Summit shot. Permasmile. Wooohoooooooooo!

  • 03/06/2019 12:34 PM | Anonymous member (Administrator)

    MAA members just completed an epic week of ice climbing in the frozen northern region of Cody, Wyoming -- and have confirmed this as the amazing multi-pitch ice climbing playground it's famous for. 

    The team completed multiple, long routes in the WI4 - WI6 range, notably "Broken Hearts" and "High on Bolder". Temps were brutal, bottoming out at -11 and below zero on most days! The team stayed in a rural cabin which MAA has secured for next year. 2020 dates for the Cody expedition are Feb. 27th - March 4th. Hope you can join us!


  • 03/06/2019 11:36 AM | Anonymous member (Administrator)

    Let's admit it, sometimes winter can be a bit dreary, and we find ourselves dreaming of climbing on warm rock and enjoying some double digit temps. So where can you get "some rad and some trad" while the mountains are still in the icy grip of old man winter? To the deserts and the eastern, dry sides of the Cascades and Sierra ranges of course...

    Joshua Tree - This National Park located just a few hours east of the Los Angeles sprawl is renowned for great weather in the "off-season" - in fact November through March is the best time to go there. J-Tree has thousands of routes on rock with incredible friction and some very unique desert scenery. It's busy on weekends so try to go mid-week if possible. There are so many areas to climb there, but some of the best are in Real Hidden Valley, off the Lost Horse Road, and at Hemingway for example. MAA sponsors trips to JT a couple times a year, mostly in the fall. Go check it out!

    Red Rock Canyon, NV - This area just outside and in a completely different world than nearby Las Vegas is famous for multi-pitch climbing on amazing sandstone. You can also find some cragging areas and even great hiking here. Finding camping is relatively easy and there is lots of room for everyone with dozens of canyons and hundreds of routes.

    Smith Rock State Park, OR - Just outside of Bend, "the birthplace of sport climbing" was created from the enthusiasm of the  climbing community and remains true to that heritage. With accessible camping (with a bathroom and showers!), an excellent trail network, generally excellent weather, this place is a mecca. Thousands of sport routes and a handful of trad routes in the widest variety are available all over these unique formations. 

    Eastern Sierra Crags - A number of locations here are significantly more tolerable during winter than summer: most notably Alabama Hills in Lone Pine, the Buttermilks, and Owens River Gorge near Bishop.

    Mountain Ascent sponsors climbing events at many of these locations every year. In 2019 we'll be at Smith Rock in May and Red Rocks in November, so far. J-Tree and other areas will certainly pop up as we get closer to summer. 

    What are some of your favorite areas to rock climb during the winter? If you have suggestions to add to this list please contact MAA at connect@mountainascent.org

    Check out Mountain Project for more information and other ideas! 

  • 02/26/2019 1:27 PM | Anonymous member (Administrator)

    Yes, Virginia, winter "fast and light" is real - and in fact has made many appearances, even on typically "heavy and slow" expeditions!

    How can you be light and fast in winter without cutting the margin of safety razor-thin? And just because you are light, does that mean you are automatically going to be fast? How about these tips from the front line.

    [Alaskan scenery captured out the window while flying into Denali - Todd Martin]

    1. Get fit. Winter climbing is demanding - heavier loads, deep snow, cold temps...it can be tough. Be prepared for it by following a fitness training program that includes cardiovascular endurance and some strength training. This will allow you to go further and last longer. Apex and Peak members both have climbing specific training programs included in their membership, take advantage of it! 
    2. Go without a 4-season tent. Opt for a snow shelter or a floorless shelter instead. With a few hours and a some motivated folks armed with shovels, you can create an sweet basecamp. Floorless shelters such as the BD MegaMid and BetaMid, or the Sierra Designs Mountain Guide Tarp, when combined with digging down in the snow, can provide a roomy and even bombproof basecamp. Or you can dig into the leeward side of a snow drift for your very own snow cave! Or create a quinzhee. Pile the snow, stomp and pack it, then dig it out in this same manner. Using any of these alternative shelter options can save you up to 10 lbs.[Illustration by Mike Clelland]
    3. Practice Multi-Use and Limit Duplication. Sleep with all your clothing on and you can bring a lighter weight sleeping bag. Bring only one torso length closed cell foam pad and use the rope and your backpack under you as additional insulation from the cold. Maybe this will in turn allow you to bring a smaller and lighter backpack. Only a few items should be duplicated: socks, gloves and headlamps in particular, and see if you can get by with only two pair rather than three. Winter is not the time to bring the coffee press and camp chair. This can save you a pound or two.
    4. Cut down on protection. Often we bring more than we need. Bring a smaller diameter (<9 mm), shorter rope, and only the minimum of protection. Or opt for a route that is non technical, such as a ridge climb, so you don't have to haul this gear. It can save you up to 10 lbs. [MAA teams on a winter ascent of The Sisters near Carson Pass]
    5. Cut down on food, and make careful selections. Yes, it's scary to contemplate running out of food, especially in winter. And you need calories to stay warm, so it's a safety thing too. But this is an area where folks routinely bring more than they need, and even return from the trip not having eaten it all. If this is the case, you probably brought too much. Consider bringing the most calorie-dense items you can, with raw BTUs as the criteria - this is not the time to be on a diet. (Bacon is one of the best for calories to weight ratio, for example!) Also, remove packaging and only bring what you are actually going to eat. Plan it out for each day. Unless you'll be further than a day's journey from the trail head, there is no need to bring "extra food", just in case. The average person can go an entire day or more without eating if necessary, you are going to make it. With careful planning and bringing no more than 3.5 lbs of food a day this, could save you many pounds of unnecessary weight.
    6. Don't carry so much water. It's important to stay hydrated but take care of that while you are in camp or by filling up at streams, if possible. You probably only need to actually carry a liter or two at a time. Each filled Nalgene (quart) weighs over 2 lbs. And when you do drink liquids, opt for hot drinks!

    All these concepts are taught on the MTN 2 training course offered by MAA in winter time. Hope this helps keep the loads lighter and the smiles bigger! 

  • 02/21/2019 4:46 PM | Anonymous member (Administrator)

    We had a team of 14 in beautiful Ouray Colorado in late January through early February. We all climbed together in the South Park area of the canyon on Tuesday (1/29) and had a blast getting reacquainted to our ice tools. Wednesday was another gorgeous day in the park with half of our group back in the School House area and the other half managed to grab most of the climbs in the Pic Of The Vic area. We had mostly to ourselves the entire day which is rare since it's probably the most popular spot in the park. To top it off, Vish made a dash into town around noon and returned with fresh hot pizza! Epic!!! It doesn't get much better than chilling with friends, climbing ice and chowing on hot pizza at the crag. The following three days were a mixture of teams top-roping & practicing lead climbing in the park, multi-pitch climbing up Camp Bird Road, and back-country multi-pitch climbing at Dexter Slabs and in the Silverton/Eureka area. To top it off, we had a potluck dinner Friday night where everyone provided a favorite dish. What a feast! Great trip! I think everyone had a serious case of permasmile on the way home. :)  


    Erik just after pulling over that overhanging ice!


    MAA rocking Pic Of The Vic area ... after pizza delivery!


    Paul above doing his ninja swing (look closely at his ice tool)


    Paul, Steve, Todd after climbing Horsetail Falls in background


    See, I told ya, PERMASMILE! 

  • 02/19/2019 12:04 PM | Anonymous member (Administrator)

    With the Sierra Nevada on overload with 136% of snowpack, avalanche safety has received a renewed emphasis. The Sierra Avalanche Center, Mount Shasta Avalanche Center, and Eastern Sierra Avalanche Center are your go-to sources for professional and reliable avalanche information, and should always be consulted before heading out in the winter backcountry. 

    This last weekend avalanche danger was HIGH throughout most of the state and continued to be that way for several days as more and more snow just kept coming. Why was it so unusually high and for so long? Primarily it was these factors: 1. weather, 2. terrain and 3. snowpack - which are all a part of a series of quick assessments you can use to determine if it's safe to venture onto steep slopes. Here's a few examples from the last week:

    Weather Red Flags:

    - It was snowing more than an inch an hour makes for unstable conditions, as the snow piles up faster than it has time to bond

    - Strong winds create "wind slab" which make the classic and deadly slab avalanche conditions more likely

    - Cold temperatures and little sun keep the snowpack loose and unbonded

    Terrain Red Flags:

    - Slopes in the zone of between 30 - 45 degrees were sliding, like they always do when triggered.

    - Terrain with a collection zone or ridge, shaped like a bowl or a chute, especially with runout zones, and broken or non-existent trees are places where avalanches occur over and over. Stay away from these places.

    [MAA team on a winter ascent of Mt. McAdie, a neighbor to Whitney. We avoided avalanche terrain by staying on ridgelines and steep rock.]

    Snowpack Red Flags:

    - The presence of a large and unstable wind slab is always a cause for concern, and cornices grew to an enormous size.

    - The presence of many storm layers create a complicated snowpack with many potential failure points - best to dig a pit and conduct some tests on your own as well!

    These are just some of the factors you should consider when heading out into avalanche terrain, but not all. There are many more things to know and assess to create a complete picture for the backcountry. So how to stay the safest? Follow these steps:

    1. Get educated - take an avalanche course. We recommend Sierra Mountain Guides in Bishop or Alpine Skills International in Truckee.
    2. Get the report - check the appropriate agency before heading out.
    3. Get away - if your goal is climbing it is usually possible to stay above and away from avalanche zones, or in terrain where it is too steep or too low angle for them to occur, such as on ridgelines, steep cliffs, or trees. Avoidance is the key.

    Have fun and stay safe out there!

    [MAA team on a winter ascent of The Sisters near Carson Pass]

  • 02/13/2019 8:14 AM | Anonymous member (Administrator)

    Winter mountaineering - it's cold and crazy out there sometimes!

    Over the course of many years camping and climbing in the "off-season" I've picked up a few tips from friends. The following tips are guaranteed to improve your outlook and make the difference between suffering and succeeding when the temps drop and the snow flies.

    1. Always use an insulating pad for sitting or laying on snow. This rule may seem obvious but actually it easy to ignore...until your butt becomes a block of ice. Take two pads out there with you, one inflatable and one non-inflatable. Use your non inflatable (e.g. "ensolite") pad under your body while sitting down to eat, cook, and of course while sleeping. Double or triple fold your pad for even better isolation from the cold. While sleeping use the inflatable pad over the ensolite pad. Full length pads are better!   
    2. Sleeping bag = clothes dryer. Yes, that's right, your gloves, socks, insoles, and even some layers can all be reclaimed from the icy grip of winter if you bring them in the sleeping bag with you. They may not be bone dry in the morning in some cases, but that's better than throwing them in a corner of the tent to find they are frozen and useless in the morning. 
    3. Everything is insulation. Before nodding off for the night arrange your gear and all the clothes you are not sleeping in anywhere underneath your sleeping bag and around you so that they benefit from your body heat, and you benefit from further isolation from the snow. Your empty backpack, gaiters, rope, and even boots should all be inside your shelter with you, either underneath you or touching you. Leaving your back pack and especially boots outside is a costly mistake - there's no reason they can't be kept drier - and keeping you drier - by being inside your shelter.
    4. Hot liquids are amazing. It's nearly impossible to have too much hot cocoa, coffee, tea, and instant soup out there. The packets take up virtually no space, and not only will you be warmer you will also stay hydrated. Will you have to get up to pee in the middle of the night? Probably, but it will give you a quiet moment to enjoy the incredible winter night sky.
    5. Water freezes from the top down. So put your water bottle with the threads down in an insulating parka and you'll never have to fight a frozen waterbottle lid again. Even better, fill it with hot water and put it in your sleeping bag near your feet or belly, and you'll be warmer for most of the night.
    6. Dry socks and dry gloves are worth the effort. Bring multiple pairs, keep them dry in a ziploc bag and always have at least one dry pair in reserve. Never drop your gloves in the snow. Instead, while not on your hands, gloves should always be kept warm and drying out in your jacket pockets, not left out to freeze somewhere. Keep socks that are drying out in your sleeping bag. Always sleep with a fresh(er), dri(er) pair of socks.
    7. The right gear makes a difference. It's all about the details. Always get jackets and layers with long sleeves and helmet-compatible hoods. Always have a minimum of three layers available for your lower body and four layers for your upper body. Always bring a beanie, a buff / balaclava, and gaiters. Waterproof your shell layers, gloves and boots every season. Use a compression stuffsack for you sleeping bag and other bulky items. Have multiple headlamps each with their own fresh batteries. Always bring an emergency blanket and/or bivy sack.

    MAA members use these skills quite often, whether its winter climbing or July in the Andes at 20,000 feet. We offer our MTN 2: Winter Mountaineering training courses from December through March. Stay dry, warm and happy out there! 

  • 02/12/2019 10:45 AM | Anonymous member (Administrator)

    MAA members spent four days climbing ice on Thor Falls and enjoying winter zen in early January. We walked from the valley all the way up the road, snowshoed / skiied up DEEP unconsolidated snow up the North Fork of Lone Pine Creek to establish a sweet basecamp at Lower Boy Scout Lake. In between great weather and storms, we got a few days of climbing on the incredibly beautiful ice below Thor Peak at around 10,700. We had acres of ice all to ourselves and climbed until we couldn't swing any more.

    There's something very cool about this area - the aesthetic of climbing smooth, perfect ice nearly at the foot of Whitney and the winter scenery are unmatched. You just have to put in the miles to get there and you will be rewarded. Thor Falls forms earlier and stays longer than any other ice crag in CA.

    We learned early season snow on the approach route is very tough, especially when you have around 5,000' to climb to basecamp with 60 lb winter mountaineering packs -- we will offer this event every year, but probably in March when the approach is more consolidated.

    Great trip, and a great team put in a lot of effort in sometimes difficult conditions to make this happen! 


www.mountainascent.org

darren@mountainascent.org

(916) 872-3399

Log in

Events

Powered by Wild Apricot Membership Software